If you've ever felt WordPress is too bloated and slow then you might want to try out building a statically generated blog, using a static site generator and a headless CMS.
What we'll be building
Updated for Nuxt 2 and Tailwindcss 1.0!
Tldr; You can check out the GitHub repo of the finished blog here and see a live demo on Netlify - https://nuxt-cockpit-static-blog.netlify.com
We'll be using the generate feature of Nuxt.js to generate a static blog and a headless CMS called Cockpit for the api.
It will be a JAMstack project, trying to follow the best practices layed out.
The definition of the JAMstack given on jamstack.org is:
Modern web development architecture based on client-side JavaScript, reusable APIs, and prebuilt Markup.
In our example we'll be writing Markdown in Cockpit for our posts that will be fetched by Nuxt.js and then parsed to HTML before generating our static blog.
Why a Static Site?
Here are just a few benefits of generating a static site:
- Better Performance
- Higher Security
- Cheaper, Easier Scaling
- Better Developer Experience
You can use a number of different static site generators such as Jekyll, Hugo, Next or Gatsby. There are also many different options for your headless CMS e.g. self hosted options like Strapi, Directus, Ponzu or you can use hosted options like Contentful, Netlify, Prismic or Storyblok.
For a more comprehensive list of headless CMSs - https://headlesscms.org/
And for a list of static site generators - https://www.staticgen.com/
For the site we're building we'll be using Nuxt.js as I love working with Vue and also Cockpit as it's a PHP based Headless CMS and is very quick and easy to set up.
Website Structure
We'll be keeping the headless CMS backend separate from the frontend site. So you will need to create a new app directory on your server called something like cms-yourblog and another site called yourblog.
You can then use yourdomain.com for the frontend and a subdomain such as cms.yourdomain.com for the backend. You can obviously use whatever subdomain you like.
Setting up Cockpit
I'm skipping setting up in our local environment with version control etc. here just to speed things up. But you may want to set Cockpit up locally first.
We don't actually need to do much configuration for Cockpit, you can simply download the zip file into your cms-yourblog web root directory and unzip the contents.
The third and forth commands below simply move the contents of the unzipped cockpit-master directory up one level to the current web root directory and then remove the empty cockpit-master directory.
cd /path/to/your/cms-yourblog/
wget "https://github.com/agentejo/cockpit/archive/master.zip"
unzip master.zip
mv cockpit-master/* cockpit-master/.[^.]* .
rmdir cockpit-master
rm master.zip
You can then go to cms.yourdomain.com/install to finish off the installation process.
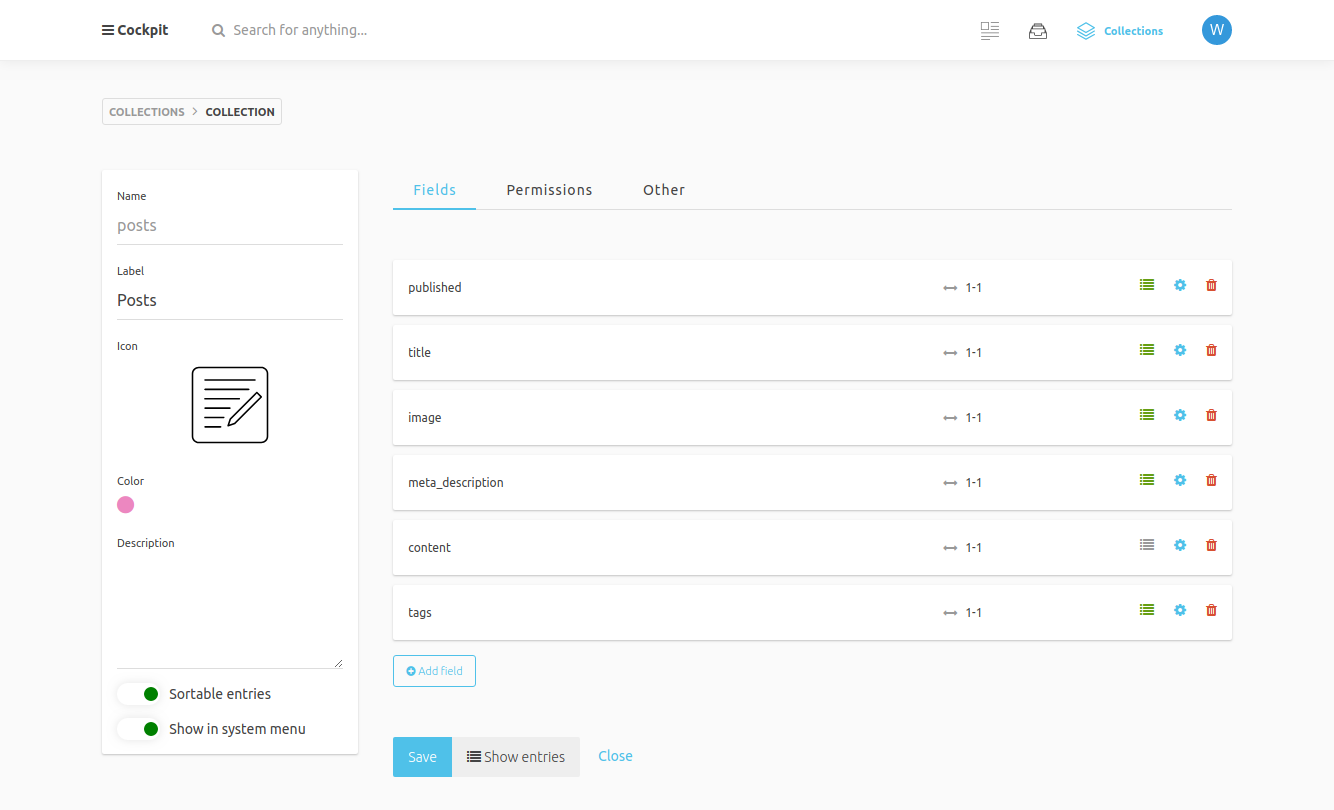
Once you've set up your new password and username we can create a posts collection. You can think of collections in cockpit like you would a table in a database.
Our new posts collection will have the following fields:
- published (type boolean) (options
{"default": false, "label": false}) - title (type text) (options
{"slug": true}) - image (type asset)
- excerpt (type textarea) - we'll use this for our meta description
- content (type markdown)
- tags (type tags)
Make sure to include the options in the provided JSON options field when adding the published and title fields.
We can now head over to settings then api access where we will generate an API key so we can retreive our posts data.
You should see there is a "MASTER API-KEY" that you can generate. This key will have full permisions for your site so you should avoid using this if possible.
Where it says Custom Keys click add key to add a new custom key. Then in the rules section add the following: /api/collections/get/posts
This means that our key will only have permission to access that particular end point for fetching blog posts. Add a small description too if you like.
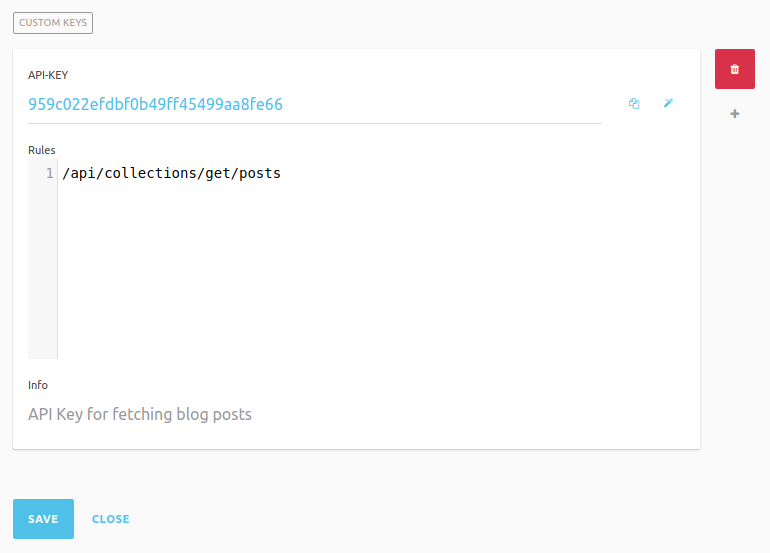
This means if our API Key was ever accidently exposed then an attacker would only be able to view posts and not create/delete them etc.
Create a couple of dummy post entries so we have some initial data to look at.
If you have Postman or Insomnia installed you can then send a get request to:
https://cms.yourdomain.com/api/collections/get/posts?token=YOUR-API-TOKEN
This should return your posts in the entries array of the response.
Now that we've got our basic CMS setup that can return our post data we can move onto setting up Nuxt.js for the frontend.
Setting up Nuxt.js
First of all we need to install Nuxt. We'll do this on our local computer and run the built in development server.
To install Nuxt run the following command:
npx create-nuxt-app static-blogWhere static-blog is the name of our app. It will ask a few questions, for custom server framework select none. For custom UI framework select none (we'll set tailwind up ourselves).
For the rendering mode select Universal. Select yes to use the axios module. We'll not bother with eslint or prettier for now so select no for both.
This will create a folder called static-blog for our frontend, you can obviously call it whatever you like.
Next we need to enter the newly created directory and run the development server (it should have already installed our dependencies).
cd static-blog
npm run dev
You can now visit http://localhost:3000 in your browser to see the site in action!
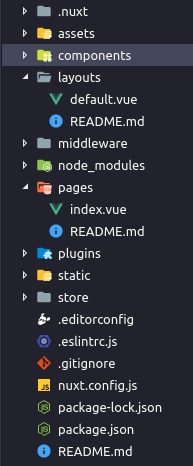
Open your preferred code editor (I'll be using Visual Studio Code) and take a look at the folder structure.
Nuxt automatically creates a route for each file in the pages directory.
So If we simply copy the index.vue file and rename it about.vue we will be able to visit it at http://localhost:3000/about.
We'll use the dotenv node module so we can access our .env variables inside nuxt.config.js. This module will allow us to create a .env file in our project root that we can store our secret api token and url in.
You should also add .env to your .gitignore file to make sure you don't accidently commit and push the contents to Github etc.
npm install dotenv --save-devOnce installed open up nuxt.config.js and add the following at the very top of the file:
require('dotenv').config()If you haven't already create a .env file at your project root and put the following inside:
URL=https://yourdomain.com
BASE_URL=https://cms.yourdomain.com
POSTS_URL=http://cms.yourdomain.com/api/collections/get/posts?token=YOUR-API-TOKEN
Making sure to replace YOUR-API-TOKEN with the token we generated earlier in Cockpit.
We'll now be able to access these variables throughout our blog using process.env.POSTS_URL for example.
The reason we used the dotenv package and didn't just add our api key to nuxt.config.js in the env:{...} property is because this gets bundled up in a js file and exposed to the client. So someone would be able to simply open our /_nuxt/xxxxxxxxxxxxxxxxxxxx.js file and see our api key in plain text!
Install tailwind for our css framework (feel free to use any other css framework you like).
npm install tailwindcss --save-devSetting up Tailwindcss with Purgecss
Next initiate the tailwind config file by running:
./node_modules/.bin/tailwind init tailwind.config.jsCreate a new directory called css inside the assets directory and then create a file in here called main.css and add the following to it:
@tailwind base;

@tailwind components;

@tailwind utilities;
Then install the following dependencies:
npm install autoprefixer glob-all purgecss-webpack-plugin --save-devThis will allow us to compile our css and also remove any unused css using purgecss.
In the root of the project create a file called postcss.config.js and insert the following:
module.exports = {
  plugins: [
    require('tailwindcss')('./tailwind.config.js'),
    require('autoprefixer')
  ]
}
Back in nuxt.config.js add the following at the very top of the file above module.exports = {...
require('dotenv').config() // we already added this ealier when making our .env file
const PurgecssPlugin = require('purgecss-webpack-plugin')
const glob = require('glob-all')
const path = require('path')
import axios from 'axios' // we'll need this later for our dynamic routes

class TailwindExtractor {
  static extract(content) {
    return content.match(/[A-z0-9-:\/]+/g) || [];
  }
}
then add our main.css file and update the build: {... object like this:
css: [
  '@/assets/css/main.css'
],
/*
** Build configuration
*/
build: {
  extractCSS: true,
  /*
  ** You can extend webpack config here
  */
  extend (config, { isDev }) {
    if (!isDev) {
      // Remove unused CSS using purgecss. See https://github.com/FullHuman/purgecss
      // for more information about purgecss.
      config.plugins.push(
        new PurgecssPlugin({
          // Specify the locations of any files you want to scan for class names.
          paths: glob.sync([
            path.join(__dirname, './pages/**/*.vue'),
            path.join(__dirname, './layouts/**/*.vue'),
            path.join(__dirname, './components/**/*.vue')
          ]),
          extractors: [
            {
              extractor: TailwindExtractor,
              // Specify the file extensions to include when scanning for
              // class names.
              extensions: ["html", "vue"]
            }
          ],
          whitelist: [
            "html",
            "body",
            "ul",
            "ol",
            "pre",
            "code",
            "blockquote"
          ],
          whitelistPatterns: [/\bhljs\S*/]
        })
      )
    }
  }
}
We've added a few tags to the whitelist to make sure that purgecss doesn't remove any styles that apply to them.
We should now have tailwindcss up and running with purgecss to remove any unused styles when we come round to running npm run generate.
Fire up the dev server with npm run dev just to make sure everything still works.
Updating our default layout
Inside the components directory create three new files; PageHeader.vue PageNav.vue and PageFooter.vue with the following contents respectively:
<template>
  <header class="text-center">
    <a class="text-gray-800 text-3xl font-bold" href="/">
      <h1>
        Static Blog
      </h1>
    </a>
  </header>
</template><template>
<nav class="text-center my-4">
<a href="/" class="p-2 text-sm sm:text-lg inline-block text-gray-800 hover:underline">Blog</a>
<a href="/about" class="p-2 text-sm sm:text-lg p-2 inline-block text-gray-800 hover:underline">About</a>
</nav>
</template><template>
<footer class="flex justify-center my-4">
<div class="text-gray-800 text-sm">
A static blog built with Nuxt.js, Tailwindcss and Cockpit.
</div>
</footer>
</template>Now go over to the layouts directory and update default.vue so that it looks like this:
<template>
  <div class="flex flex-row justify-center w-screen">
    <div class="overflow-hidden content flex flex-col p-4 md:p-8">
      <page-header/>
      <page-nav/>
      <nuxt/>
      <page-footer/>
    </div>
  </div>
</template>
<script>
import PageHeader from '~/components/PageHeader.vue'
import PageNav from '~/components/PageNav.vue'
import PageFooter from '~/components/PageFooter.vue'
export default {
components: {
PageHeader,
PageNav,
PageFooter
}
}
</script>Delete any of the default styles that were there as we won't be needing them.
Also add the following style to our main.css file underneath @tailwind components:
.content {
  width: 50rem;
}

.markdown p {
  @apply mt-0 mb-6;
}

.markdown ul {
  @apply mb-6;
}

pre {
  @apply my-8;
}
Now we just need to update index.vue in the pages directory.
Fetching and displaying our posts
Make sure that you have the axios module loaded correctly in your nuxt.config.js
/*
** Nuxt.js modules
*/
modules: [
  // Doc: https://github.com/nuxt-community/axios-module#usage
  '@nuxtjs/axios'
],
In the index.vue page update the file so that it resembles the following:
<template>
  <section>
    <div class=my-8>
      <ul class="flex flex-col w-full p-0">
        <li class="mb-6 w-full" v-for="(post, key) in posts" :key="key">
          <div class="text-gray-600 font-bold text-sm tracking-wide">
            <a v-for="tag in post.tags" :key="tag" :href="'/category/'+tag" class="ml-1">{{ tag }}</a>
          </div>

          <a :href="'/'+post.title_slug">
            <h2 class="my-2 text-gray-800 text-lg lg:text-xl font-bold">
              {{ post.title }}
            </h2>
          </a>

          <div class="page-content hidden md:block text-base mb-2" v-html="post.excerpt">
          </div>
          <a class="text-sm text-blue-400 no-underline" :href="'/'+post.title_slug">
            Read more
          </a>
        </li>
      </ul>
    </div>
  </section>
</template>
<script>
export default {
async asyncData ({ app }) {
const { data } = await app.$axios.post(process.env.POSTS_URL,
JSON.stringify({
filter: { published: true },
sort: {_created:-1},
populate: 1
}),
{
headers: { 'Content-Type': 'application/json' }
})
return { posts: data.entries }
}
}
</script>Nuxt includes the asyncData method which can be called on the server side before the component data has been set. You can read more about this method here - https://nuxtjs.org/guide/async-data
What we are doing is retrieving the posts from Cockpit and then setting these as the component data in a posts variable.
If you visit the site now at http://localhost:3000 you should see the post entries you've added from Cockpit.
You should now have something that looks like this.
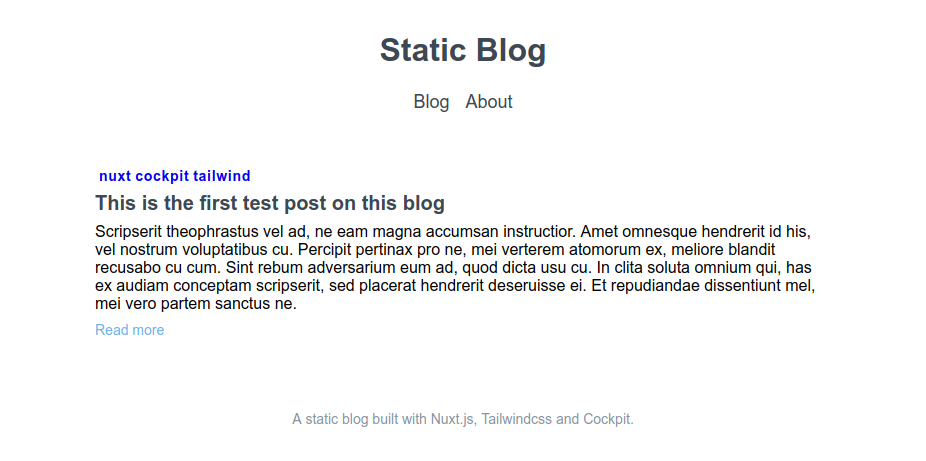
In the next part we'll look at generating our dynamic routes in nuxt.config.js for our individual blog posts based on their title slug and also setting up our category page to display posts depending on their tags.
You can find Part 2 here - Part 2: Dynamic Routes