In this post we'll look at adding a few finishing touches to the site and then at how we can go about deploying it. Including setting up automatic regeneration for the site when a post is updated, added or removed.
If you haven't read Parts 1 and 2 of this guide you can find them here - Part 1: Setup and here - Part 2: Dynamic Routes
Before we look at deploying our static blog let's add a few finishing touches like a sitemap and page titles etc.
Adding a Sitemap
In the project root run the following to install the Nuxt Community sitemap module:
npm install @nuxtjs/sitemap --save-devThen in your nuxt.config.js add the sitemap to the modules: property
modules: [
  // Doc: https://github.com/nuxt-community/axios-module#usage
  '@nuxtjs/axios',
  '@nuxtjs/sitemap'
],
Then still in nuxt.config.js add the following code below the generate: property
sitemap: {
  path: '/sitemap.xml',
  hostname: process.env.URL,
  cacheTime: 1000 * 60 * 15,
  generate: true, // Enable me when using nuxt generate
  async routes () {
    let { data } = await axios.post(process.env.POSTS_URL,
    JSON.stringify({
        filter: { published: true },
        sort: {_created:-1},
        populate: 1
      }),
    {
      headers: { 'Content-Type': 'application/json' }
    })

    const collection = collect(data.entries)

    let tags = collection.map(post => post.tags)
    .flatten()
    .unique()
    .map(tag => `category/${tag}`)
    .all()

    let posts = collection.map(post => post.title_slug).all()

    return posts.concat(tags)
  }
},
Here we are simply letting the sitemap module know what routes we have.
Setting Page Titles and Meta
When we deploy our site we want to have the correct page titles and meta descriptions for each post, so let's look at sorting this out.
In the head: {...} property of nuxt.config.js you'll see we have a title and meta property we can set. Set these to the default for your blog.
Lets look at our about.vue page we created in the first part of this guide. If you don't have one just create a new about.vue file in the pages directory and add the following:
<template>
  <section class="my-8">
    <div class="text-center">
      <h1 class="mb-6">About Page</h1>
      <p>
        Hi this is a static blog made with Nuxt.js, Cockpit and Tailwindcss!
      </p>
    </div>
  </section>
</template>
<script>
export default {
head () {
return {
title: 'About',
meta: [
{ hid: 'description', name: 'description', content: 'This is the about page!' }
]
}
}
}
</script>Note the hid property, if we are declaring the same meta tags as in our nuxt.config.js we need include this so that Nuxt does not duplicate the meta tags. Instead it overides those in nuxt.config.js with the ones we add here with the same hid value.
But what about in our dynamic post and category pages?
Open up your _title_slug.vue page and add the following beneath the asyncData method:
head () {
  return {
    title: this.post.title,
    meta: [
      { hid: 'description', name: 'description', content: this.post.excerpt },
    ]
  }
}
You can run the dev server and make sure everything is working correctly and the page titles are being set.
Do the same for _tag.vue in the category directory.
head () {
  return {
    title: `Posts tagged with ${this.category}`,
    meta: [
      { hid: 'description', name: 'description', content: `All blog posts categorised as ${this.category}.` },
    ]
  }
}
If you want to improve this further you can add meta tags for social media sites like Twitter, Google and Facebook.
Also using Real Favicon Generator you can create all the correct icons etc. Just add the files to your static directory and they will be copied over to the dist directory when you run npm run generate.
Displaying our Post Dates
So far we haven't displayed the creation date for any of our blog posts so let's look at how we can do this.
Install day.js with the following command:
npm install dayjs --save-devWe're using dayjs as we only want to do some simple date formatting and moment.js is overkill for this situation.
Once installed open up the filters.js file in the plugins directory and update it so that it looks like this:
import Vue from 'vue'
import highlightjs from 'highlight.js'
import marked, { Renderer } from 'marked'
const dayjs = require('dayjs')
import advancedFormat from 'dayjs/plugin/advancedFormat'
dayjs.extend(advancedFormat)

// Only import the languages that you need to keep our js bundle small
highlightjs.registerLanguage('php', require('highlight.js/lib/languages/php'))
highlightjs.registerLanguage('javascript', require('highlight.js/lib/languages/javascript'))
highlightjs.registerLanguage('css', require('highlight.js/lib/languages/css'))

// Create your custom renderer.
const renderer = new Renderer()
renderer.code = (code, language) => {
  // Check whether the given language is valid for highlight.js.
  const validLang = !!(language && highlightjs.getLanguage(language))
  // Highlight only if the language is valid.
  const highlighted = validLang ? highlightjs.highlight(language, code).value : code
  // Render the highlighted code with `hljs` class.
  return `<pre><code class="hljs ${language}">${highlighted}</code></pre>`
}

// Set the renderer to marked.
marked.setOptions({ renderer })

Vue.filter('parseMd', function(content) {
    return marked(content)
})

Vue.filter('toDate', function(timestamp) {
  return dayjs(timestamp*1000).format('Do MMM YY')
})
We needed to import advancedFormat since the Do date format is not included in dayjs by default. If you want to format you dates differently you might not need this.
Cockpit returns our created date as a timestamp in seconds, so we need to multiply it by 1000 to get it into milliseconds. Then we just format it to our liking.
You can now go and update index.vue, _tag.vue and _title_slug.vue to include the post's created date like so {{ post._created | toDate }}.
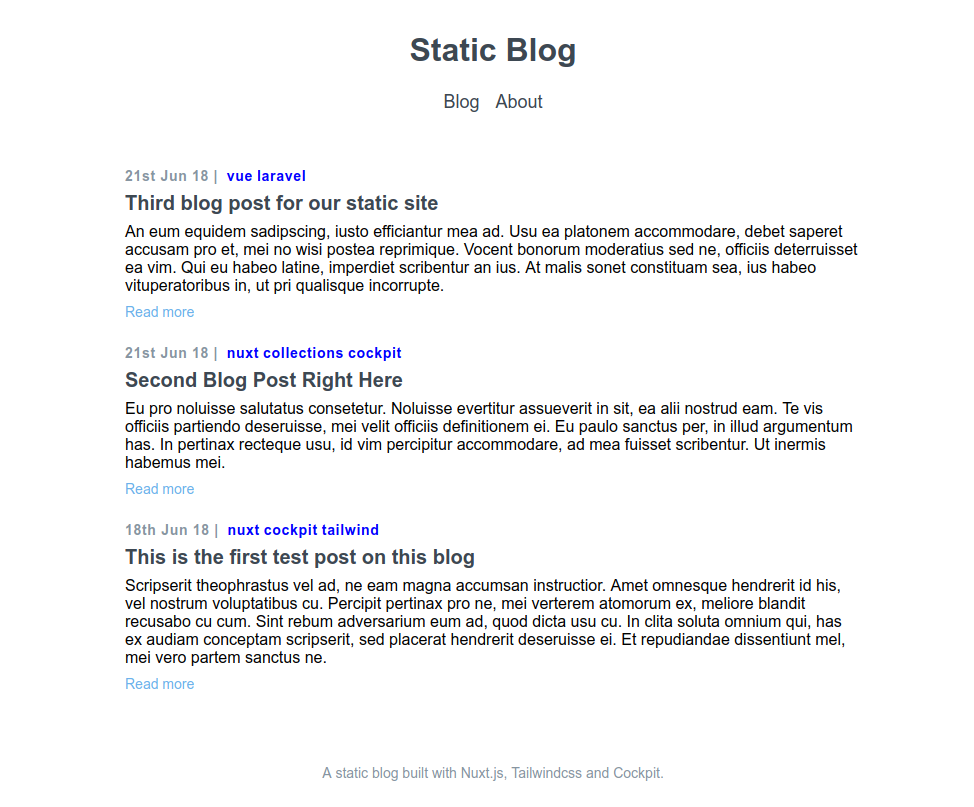
Your site should now look something like this.
Deploying the Site
Now that our site is in reasonable shape let's look at deploying it.
By far the easiest place for us to deploy our site is Netlify.
We can simply link our git repository on GitHub/GitLab/Bitbucket and it will automatically be updated and rebuilt on Netlify whenever we push changes. We can also easily add webhooks that allow us to tell Netlify to regenerate the site when we update one of our blog posts in Cockpit.
Just before we do this we need to add a little script to the root of our site that will allow Netlify to create a .env file at the time it builds our site.
The reason we need to do this is because we added our .env file to our .gitignore file so it won't be committed to git and Netlify won't have access to our Cockpit API key!
So create a new file called create-env.js and add the following to it:
const fs = require('fs')
fs.writeFileSync('./.env', `
BASE_URL=${process.env.BASE_URL}\n
POSTS_URL=${process.env.POSTS_URL}\n
URL=${process.env.URL}
`)
All this little script does is create a .env file from the Build environment variables that we will set up in Netlify soon.
If you haven't already initialise a git repository for your site and then push it to whichever service you use (e.g. GitHub).
Sign up at Netlify (it's free) and add a new site from git.
When you've allowed Netlify access and selected the correct git repository you need to add the following under Deploy Settings as the Build command:
node ./create-env.js && npm run generateRemember to set the Publish directory as dist.
This tells Netlify to run our create-env.js script above and write to a .env file so we can use our Cockpit API key etc.
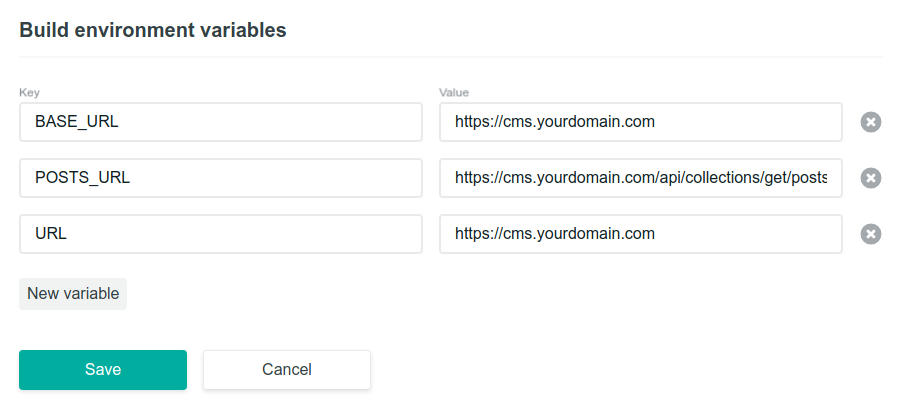
Finally we need to tell Netlify what our Build environment variables are so click "new variable" until you have something like this.
Now with any luck you'll be able to push changes to GitHub etc and Netlify will automatically be notified of the changes and rebuild your site by running the npm run generate command we specified above!
Setting up Build Webhooks
So we've got automatic deploys set up for pushing changes to GitHub etc. but now we need to tell Netlify to rebuild of static site when we update, add or delete a post in Cockpit.
In Netlify under "Build & Deploy" Settings you should see an option to add a build hook.
Click on this and call it something like Regenerate Blog.
You should then see a URL like this https://api.netlify.com/build_hooks/xxxxxxxxxxxxxxxx copy this URL and then head over to your Cockpit backend - https://cms.yourdomain.com.
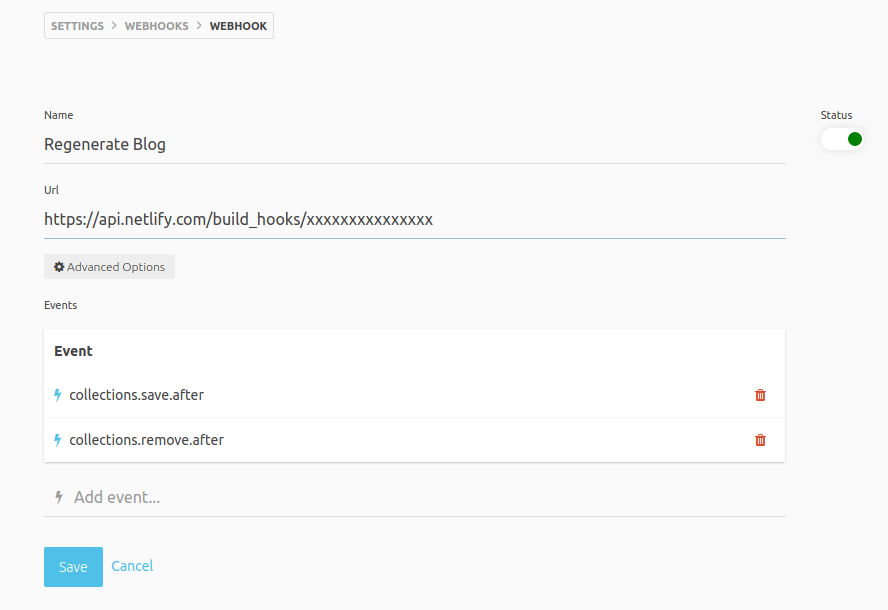
Once signed into Cockpit go to settings, webhooks and click "create a webhook". Call the webhook Regenerate Blog or anything like that and paste in your Netlify Build Hook URL.
Make sure to add events collections.save.after and collections.remove.after.
Click save and then go edit one of your posts to see if everything is working.
You should see after a minute or so that Netlify has automatically regenerated the static site for us!
You can now go on to add your own custom domain to your blog and also add an SSL certifcate with forced https redirection.
Deploying without using Netlify
We could also create a similar setup to the above on our own Digitalocean, Vultr etc. VPS using a small server to accept webhooks and run shell commands. I'll cover this in a future post!
Update! You can find my post explaining this here - Setting up Automatic Deployment and Builds Using Webhooks
Wrapping up
Hopefully you can see how easy it is to get up and running with a simple statically generate site using Nuxt and Cockpit. Paired with Netlify it really is a great developer experience and being served on Netlify's CDN makes it extremely fast!
You can check out the GitHub repo of the finished blog here and see a live demo of the site on Netlify here - https://nuxt-cockpit-static-blog.netlify.com