In this post of our Nuxt Cockpit series we'll be looking at how to add basic live search functionality for our blog posts so that readers can quickly find what they're looking for. To achieve this we'll be using an awesome service called Algolia.
If you haven't read Parts 1, 2, 3 and 4 of this guide you can find them here:
Adding Live Search on a Static Blog
Typically when searching for something you would submit a form that would then be sent to a backend which would then query a database and return the results.
If you want to implement live searching you need to send requests in real time as the user is typing so results can be displayed almost immediately.
Since our site is just a static blog made up of plain old HTML, CSS and Javascript we'll need to send requests elsewhere to get our search results.
Luckily for us Cockpit has a full-text search addon called Detektivo. To install this addon you simply need to add the files to your Cockpit CMS directory under addons/Detektivo.
You can do this by running the following commands from the command line.
cd /path/to/your/cms-yourblog/
cd addons
git clone https://github.com/agentejo/Detektivo.git
Detektivo supports a few different engines; Algolia, ElasticSearch and TNTSearch. We will be using Algolia here so visit the website and create an account (It has a great free tier).
Once you've created your Algolia account you can get your Application ID and Admin API Key. We need the Admin Key and not the Search-Only Key as we will be using it to add/update index records to be searched.
Now we need to update our config.yaml file in Cockpit. So go to settings and then click settings again and you should see a text editor.
Add the following inside:
# Search settings
detektivo:
    engine: algolia
    app_id: <YOUR-APP-ID>
    api_key: <YOUR-API-KEY>
    collections:
        posts: [title, title_slug, excerpt]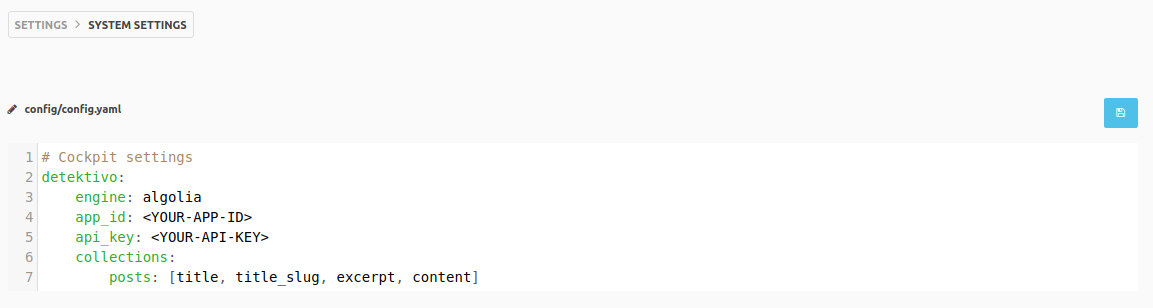
Under collections you can see 'posts', this is in reference to our posts collection. The array containing title, title_slug and excerpt are the fields in this collection that we wish to be included in our index in Algolia.
Read more about record size limits here - https://www.algolia.com/doc/faq/basics/is-there-a-size-limit-for-my-index-records/
It is probably best to do just the title, title_slug and excerpt fields to be on the safe side.
Adding Our Posts Index to Algolia
Whilst logged in to Algolia create a new index and call it posts. There won't be any records here yet as we have not added them.
In Algolia you can add records in three different ways; manually, by file upload or via the API.
We'll be using the API which is why we needed to add our Admin Key in our Cockpit configuration.
Adding Our Posts to Algolia
If you head back over to Cockpit and click on the menu you should see a new item under 'DETEKTIVO' called Manage Index, click on it.
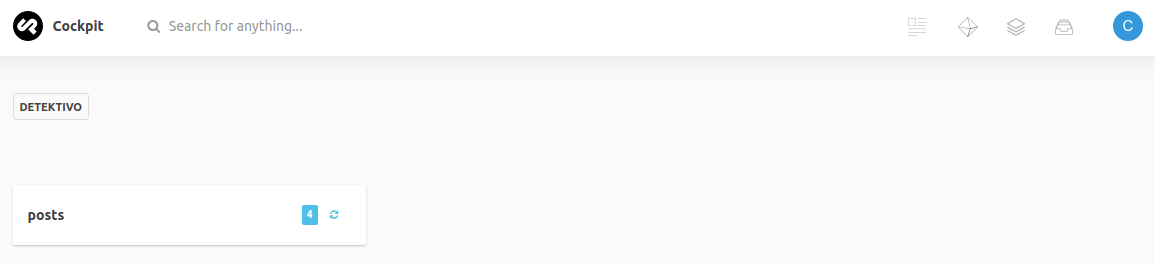
You'll see your posts collection is listed because you added it in config.yaml. The number 4 refers to the number of fields that will be indexed. (This will be 3 if you just have title, title_slug and excerpt).
If you now click the refresh icon to Re-Index the posts they will become visible in Algolia.
You can edit the configuration for this index by going to - www.algolia.com/apps/<YOUR-APP-ID>/explorer/configuration/posts/searchable-attributes
Here you can add things like searchable attributes, rankings and set up result highlighting.
You may wish to update the Search behavior > Retrieved attributes to be just the title and title_slug so that the response will be smaller and easier to read.
Now that we have some records in Algolia that can be searched we can make a GET request using Postman or Insomnia or even by just visiting the URL in the browser.
The endpoint we'll be using with Detektivo will be cms.yourdomain.com/api/detektivo/collection/posts?token=<COCKPIT-SEARCH-API-KEY>&q={searchterm}
Where <COCKPIT-SEARCH-API-KEY> is a key we've yet to create.
The great thing about the Detektivo addon is that each time you add/update/delete a post it automatically updates our posts index at Algolia for us.
Adding a Search-Only API Key in Cockpit
We need to create a new API key in Cockpit however we need to make sure it only has permissions to perform searches on our posts collection and nothing else. That is because the key will be public and exposed in each request made.
We MUST NOT use our MASTER API-KEY or any other Key we've previously created in Cockpit.
So head over to Settings then API Access in Cockpit and click the little plus icon to generate a new API Key.
Make sure to add /api/detektivo/collection/posts in the rules section like so:
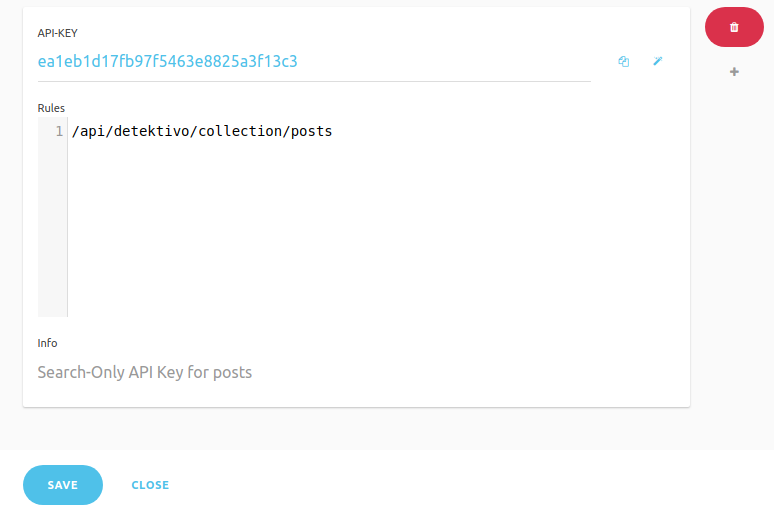
This rule means only requests made to that endpoint with the key will be authorised.
Now if you make a get request to the endpoint mentioned above with a search term you know exists in the title of one of your posts you should see some results returned.
Updating Our Blogs Environment Variables
Open up your .env file for Nuxt and add a new variable called SEARCH_URL.
SEARCH_URL=https://cms.yourdomain.com/api/detektivo/collection/posts?token=*COCKPIT-SEARCH-API-KEY*&q=Now we also need to update our nuxt.config.js and add an env property. Add the following anywhere inside module.exports = { ... }
env: {
  searchUrl: process.env.SEARCH_URL
},
The reason we need to do this is because we will be making requests to our searchUrl on the client side which means we need to have this variable bundled up in our js files.
Now we will be able to access the searchUrl variable even after our site has been generated. Don't worry, the token we are using is our Search-Only Key so nobody will be able to delete or edit our posts etc.
Make sure you also update your create-env.js if deploying to Netlify.
const fs = require('fs')
fs.writeFileSync('./.env', `
BASE_URL=${process.env.BASE_URL}\n
POSTS_URL=${process.env.POSTS_URL}\n
URL=${process.env.URL}\n
PER_PAGE=${process.env.PER_PAGE}\n
SEARCH_URL=${process.env.SEARCH_URL}
`)
Adding a New Search Page
First we'll just update our PageNav.vue component to add a link to the new page:
<template>
  <nav class="text-center my-4">
    <a href="/" class="p-2 text-sm sm:text-lg inline-block text-gray-800 hover:underline">Blog</a>
    <a href="/about" class="p-2 text-sm sm:text-lg p-2 inline-block text-gray-800 hover:underline">About</a>
    <a href="/search" class="p-2 text-sm sm:text-lg p-2 inline-block text-gray-800 hover:underline">Search</a>
  </nav>
</template>
In the pages directory of your blog add a new file called search.vue and put the following inside it:
<template>
  <section class="my-8">
    <div class="text-center">
      <h1 class="mb-6">Search Page</h1>
      <p>
        This is a live search example using Algolia and Cockpit!
      </p>

      <div class="my-8">

        <input type="text" name="searchTerm" v-model="searchTerm" placeholder="Search Posts..." class="text-center block mt-2 bg-gray-200 rounded w-full py-2 px-3">

        <div v-if="results.length !==0" class="search-results">
          <a v-for='result in results' :key="result.title_slug" :href="'/'+result.title_slug" class="block text-gray-800 p-3 text-left">
            {{ result.title }}
          </a>
        </div>

        <div v-else-if="searchTerm.length >= 3">
          <span class="block text-gray-800 p-3 text-left">
            No results found
          </span>
        </div>

      </div>
    </div>
  </section>
</template>
<script>
import axios from 'axios';
export default {
data: function () {
return {
searchTerm: '',
results:[]
}
},
watch: {
searchTerm: 'search'
},
methods: {
search() {
if(this.searchTerm.length < 3){
return this.results = []
}
axios.get(process.env.searchUrl+this.searchTerm)
.then(response => {
this.results = response.data.hits
})
}
}
}
</script>So what we're doing here is simply telling Nuxt to watch the searchTerm variable and to call the search method when it changes. If it has a length longer than 2 we will make a call to Cockpit to fetch the search results.
These results are then displayed and they use the title_slug as the url for the link.
Adding Highlighting for Results
To improve these results we could add highlighting by changing {{ result.title }} to:
<span v-html="result._highlightResult.title.value"></span>To make this work you first need to go to Algolia and add the title to Attributes to highlight in Pagination and Display > Highlighting.
This will return the highlighted title word(s) wrapped in <em></em> tags by default. That is why we need to use v-html otherwise the em tags would simply be rendered as a string.
You could then add a simple css rule to give the em tag a nice background colour for highlighting.
You can add something like this to main.css
/* purgecss ignore */
.search-results em {
  @apply not-italic bg-blue-200;
}
I've added a purgecss ignore comment here to make sure this css isn't removed when we build the site because .search-results em will not actually exist at build time as it is only present if we search on the client side so the css would be removed otherwise.
We could also add highlighting for the post excerpt. However the excerpt may be too long so we don't want to display the whole thing in the results.
Snippeting The Post Excerpt
Algolia offers a feature called snippeting that allows us to only display a snippet of text around the matched word(s).
If you visit Attributes to snippet in Algolia and add excerpt then you can update the html to the following:
<template>
  <section class="my-8">
    <div class="text-center">
      <h1 class="mb-6">Search Page</h1>
      <p>
        This is a live search example using Algolia and Cockpit!
      </p>

      <div class="my-8">

        <input type="text" name="searchTerm" v-model="searchTerm" placeholder="Search Posts..." class="text-center block mb-4 shadow text-gray-600 rounded w-full py-2 px-3">

        <div v-if="results.length !==0" class="search-results">
          <a v-for='result in results' :key="result.title_slug" :href="'/'+result.title_slug" class="block text-gray-800 p-3 text-left">
            <span v-html="result._highlightResult.title.value" class="block font-bold mb-1"></span>
            <span v-html="result._snippetResult.excerpt.value"></span>
          </a>
        </div>

        <div v-else-if="searchTerm.length >= 3">
          <span class="block text-gray-800 p-3 text-left">
            No results found
          </span>
        </div>

      </div>
    </div>
  </section>
</template>
You should now see something like this:
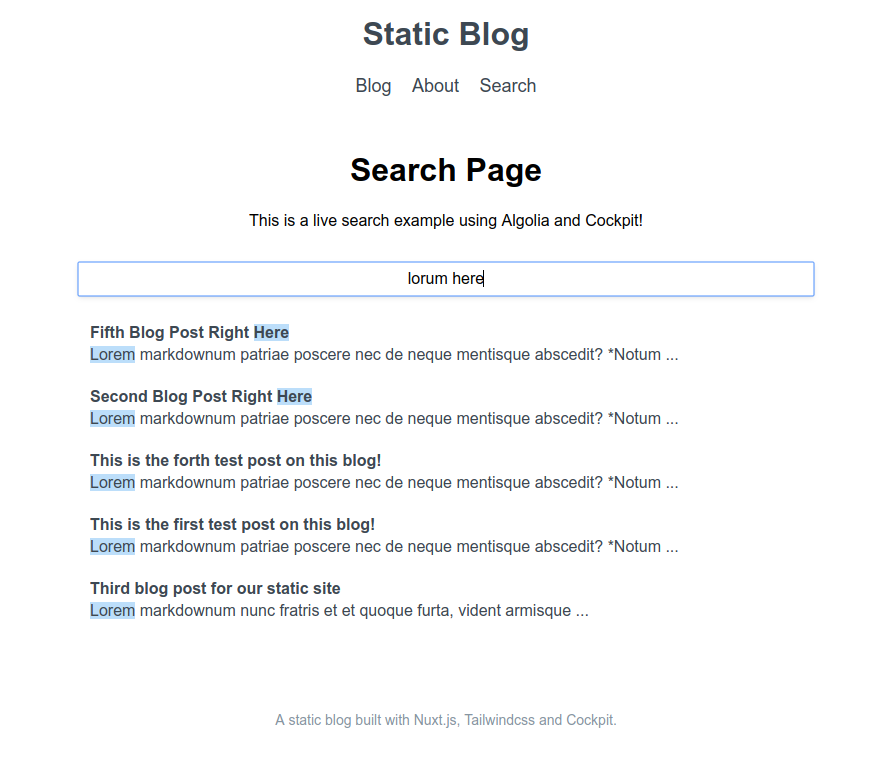
With title and excerpt highlighting and also snippeting for the post excerpt.
You can check out the GitHub repo of the finished blog here and see a live demo of the site on Netlify here - https://nuxt-cockpit-static-blog.netlify.com